Cloud native certificate enrollment via Microsoft Intune (Part 2/3) – Intune Configuration

This is the second part of a (for now) 3-part blog series about how to enroll user/device certificates via Microsoft Intune. In this series I’m going to show you:
- How to you can easily set-up a cloud-based Certification Authority (part 1).
- The deployment of user and/or device (SCEP) certificates to Windows devices (part 2).
- How to securely authenticate to network resources with a certificate via Radius (part 3).
Last time I covered how to deploy the SCEPman Certificate Authority via Azure Marketplace. This time I’m going to show you how you can easily deploy SCEP user and/or device certificates via Microsoft Intune.
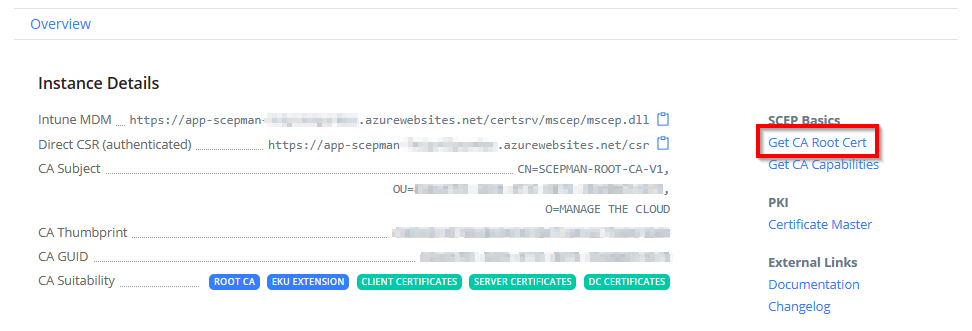
To get started you first download the CA Root Cert from the SCEPman portal. This Root Cert do we need to deploy to all our devices that are receiving certificates via SCEPman, only with the Root Cert installed it is possible to verify the authenticity of the certificates that are being deployed.
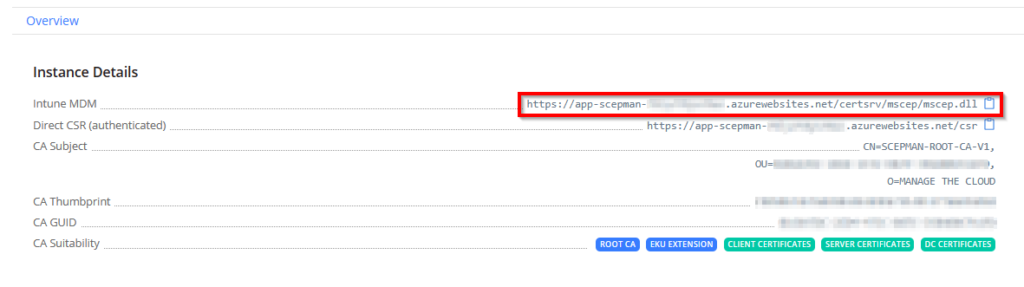
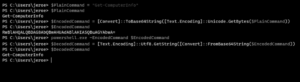
Now, let’s go to the SCEPman portal and download the CA Root Cert, you can retrieve the URL via the Azure portal, go to the App Services, select app-scepman-xxxxxxxxxxxxx and click on the “Default domain” URL.
When you have downloaded the Root Cert the download will look something like:

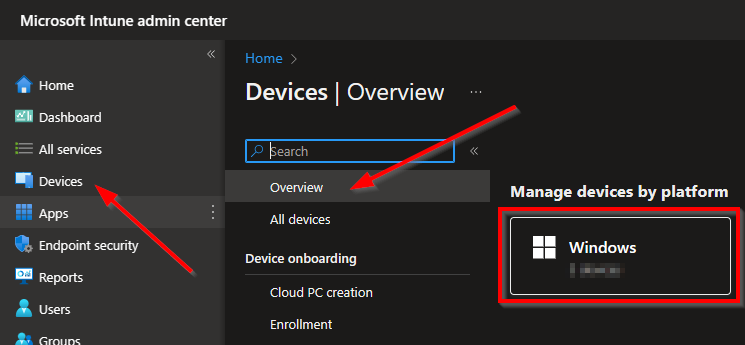
Now let’s go to the Intune portal, select Devices followed by Overview and then Windows.
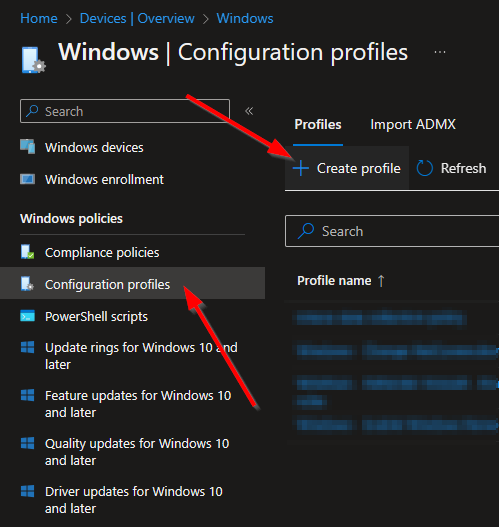
Select Configuration profiles and select Create profile.
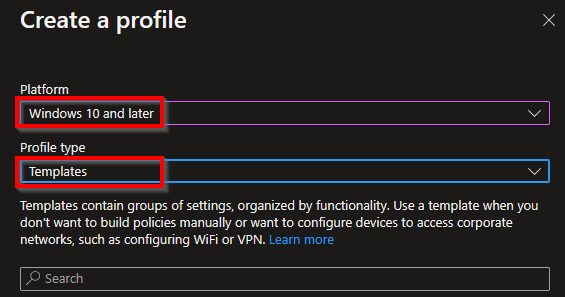
On the next screen select Windows 10 and later followed by Templates.
Note: I always prefer to use the Settings Catalog but unfortunately this is not (yet) possible for Trusted certificates.

Select Trusted certificate and then Create in the template selection overview.

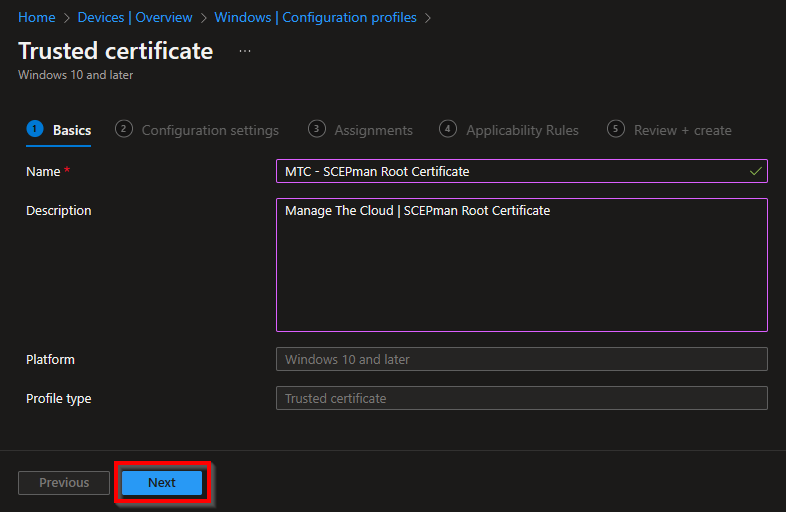
Give the template a proper name and description and click on Next.
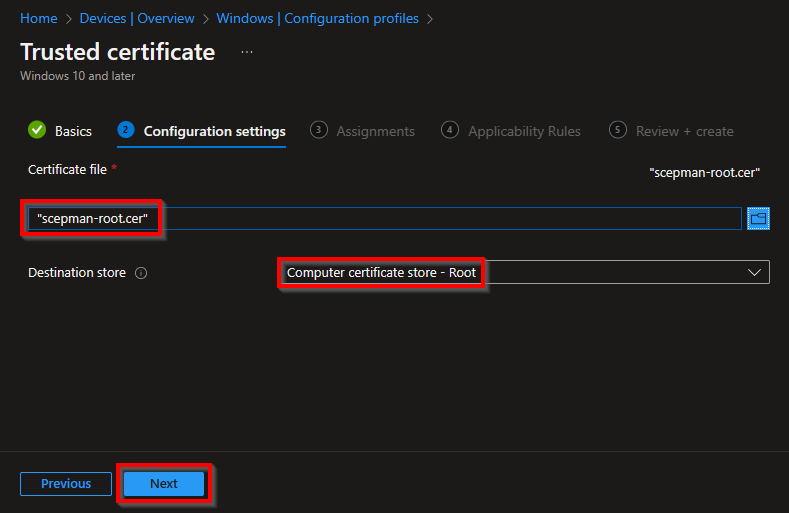
Upload the Root Cert that you have downloaded in an earlier stage, choose as the destination store Computer certificate store – Root. Now click Next to proceed.
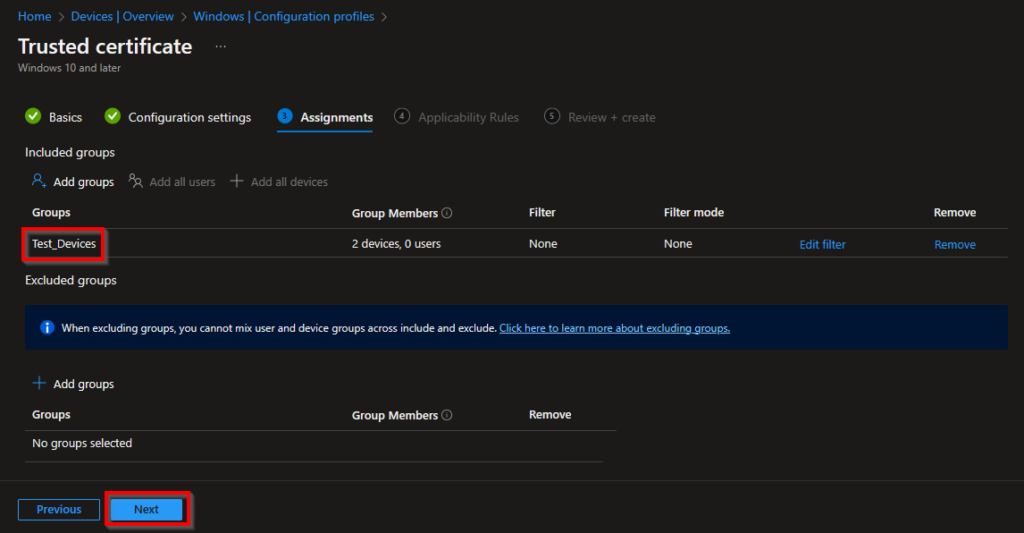
Add a group (of devices) that you want to deploy the Root Cert to and click Next.
In the following screen choose Next in the Applicability Rules and Create in the Review + create section.
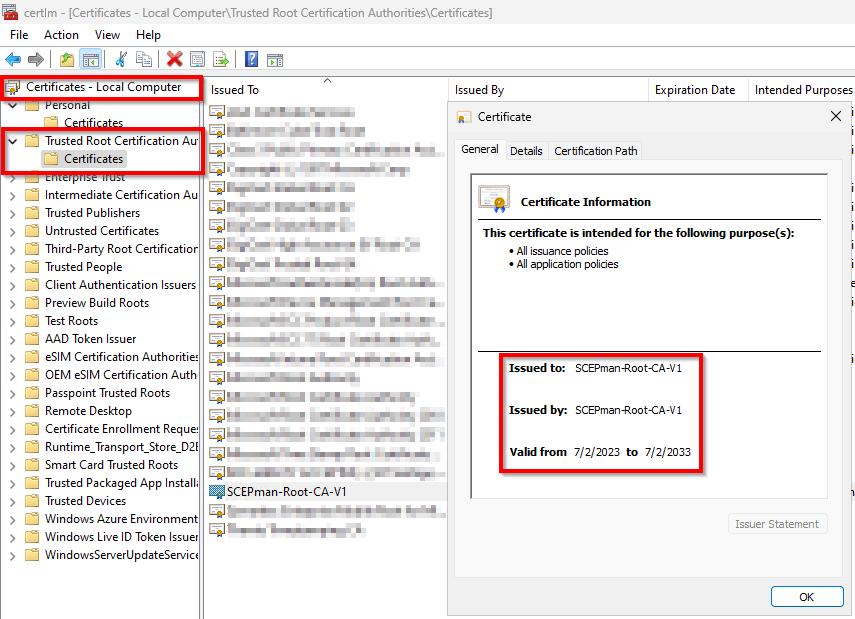
When the newly created Configuration Profile arrives at the device, soon enough you will see the Root Cert being stored in the Trusted Root Certification Authorities!
Up next, we are going to create the SCEP configuration profile.
Go to the SCEPman portal (as described earlier) and copy Intune MDM URL.
Same as before, go to Devices, Windows, Configuration profiles and create a profile.
Select the platform and profile type and choose for the SCEP certificate template. Now click Create.
Note: I always prefer to use the Settings Catalog but unfortunately this is not (yet) possible for SCEP certificate.


Again, fill in a proper name and description and click on Next.

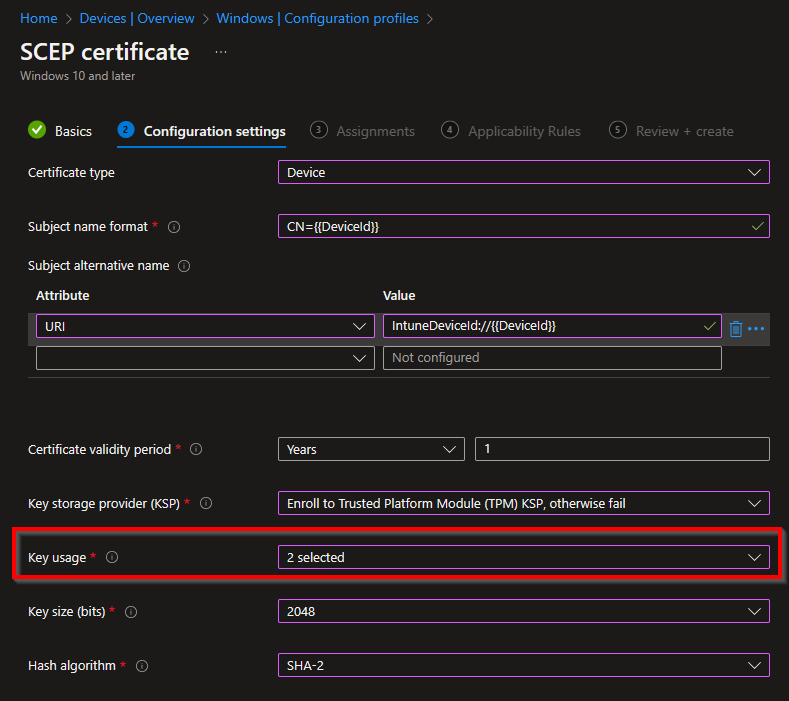
Now the fun part is going to start, we’re actually going to create the Configuration Profile that is going to deploy the SCEP certificate. Fill in the fields as in the image below.
SCEPman uses the CN field of the subject to identify the device and as a seed for the certificate serial number generation. Azure AD and Intune offer two different IDs:
- {{DeviceId}}: This ID is generated and used by Intune (Recommended)
(requires SCEPman 2.0 or higher and AppConfig:IntuneValidation:DeviceDirectory to be set to Intune or AADAndIntune)
- {{AAD_Device_ID}}: This ID is generated and used by Azure AD.
In the Key usage, activate both cryptographic actions:
Digital signature and Key encipherment
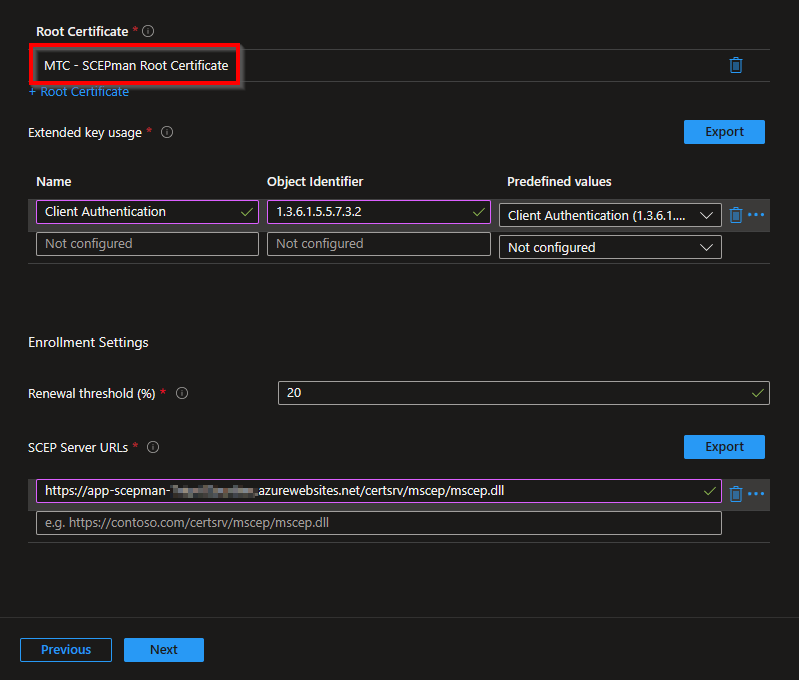
Now select the Root Cert that you have uploaded as Trusted certificate and paste the Intune MDM URL from the SCEPman portal
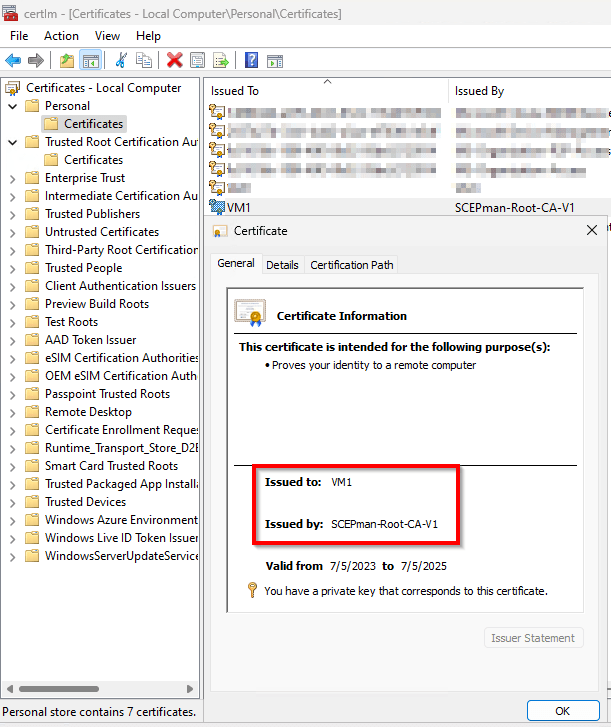
When the configuration profile arrives on the device, soon enough you will see the SCEP certificate being installed in the Personal certificate store of the device.
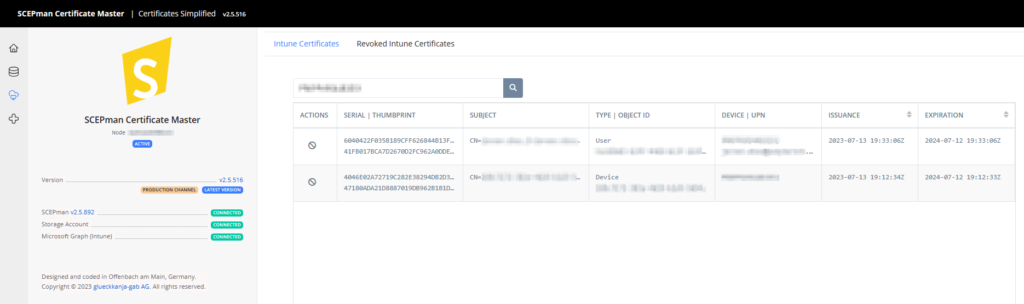
When the certificate is deployed this will be visible in the SCEPman portal. All the deployed certificates are visible under Intune Certificates.
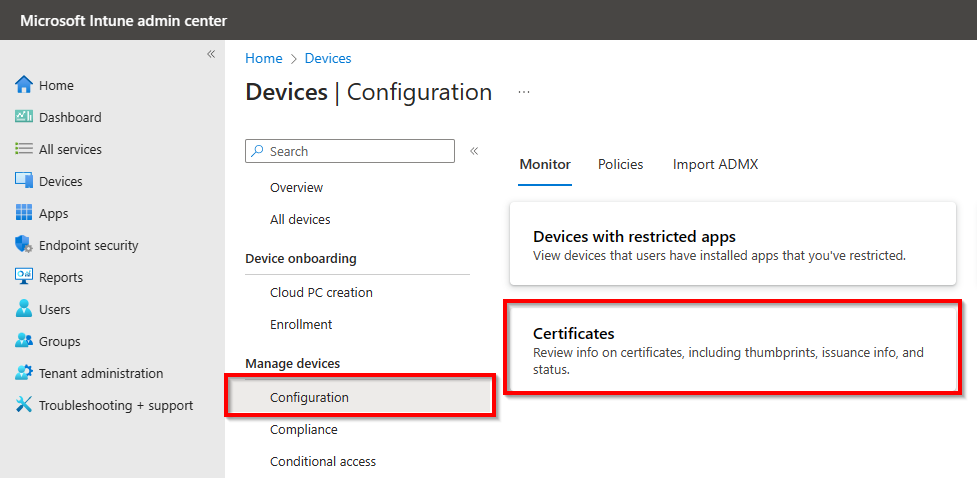
In Microsoft Intune, the issued certificates are also visible, go to Configuration and select Certificates.
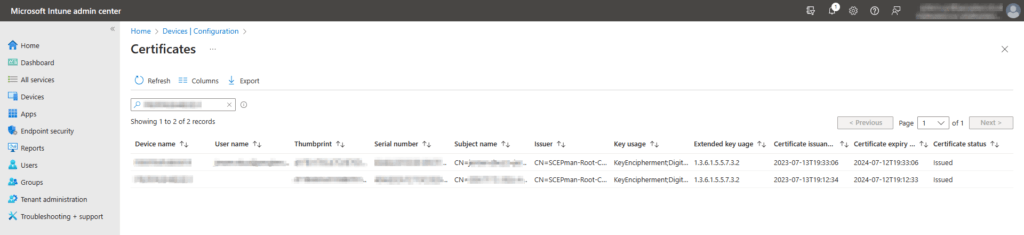
All the issued certificates are visible, the device certificates and also the user certificates.
Of course, it is also possible to create user certificates or specific certificates for email signing with SCEPman and Microsoft Intune Configuration Profiles. Please let me know if you are interested in this and maybe I can also create a guide for this.
Thanks for reading, I hope that you enjoyed reading and maybe learned something from this part.
And again, stay tuned for the next part. Were I’m going to show how to authenticate against network gear with the SCEP certificate.


2 thoughts on “Cloud native certificate enrollment via Microsoft Intune (Part 2/3) – Intune Configuration”